Sending data from giosg Interaction Builder requires connecting giosg to your existing Google Analytics or Google Tag Manager account. This can be done by following our comprehensive Google Analytics installation guide.
To get the data from an interaction to flow to your analytics you can create goals to your interaction’s views or button clicks. When the goal is met, it will automatically create an event to Google Analytics when the above mentioned setup is done.
Track a specific view in an interaction and create a goal for a view
Track a specific button in an interaction and create a goal for a button
1. Create a goal for a view
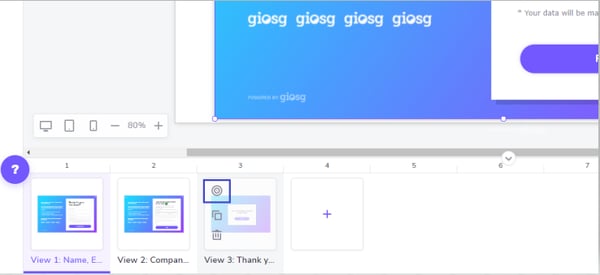
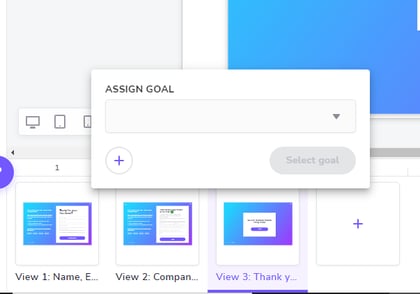
Creating goals to a view can be done directly from Interaction Builder. Just select the correct interaction and set a goal to a view by clicking the target image on top of the view.
You can either assign an existing goal to your interaction from the dropdown menu or create a new one from the “+” -icon.
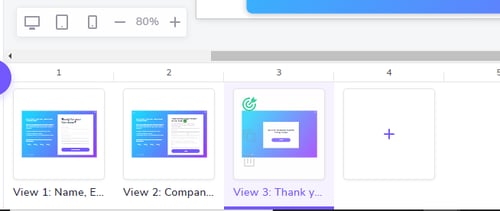
After the goal has been assigned, it is indicated with a green target on top of the view.
Example:
If you want to follow the amount of leads you’ve gotten from a lead form, the easiest way is to have a “Thank you” view which appears when the customer clicks the “Submit” button. Then assign a goal to that view, since it can only be shown when the form has been submitted.
2. Assign goals to button clicks in Interaction Builder
If you want to track how many times a button has been clicked, and get that data passed on to Google analytics, you need to create a goal for the button.
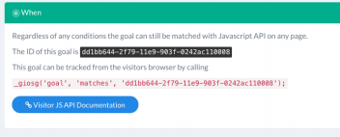
To assign a goal to a button click, you first create the goal by navigating to service.giosg.com → Settings → Goals → “Create a new goal”. In order to create the goal, first add a name to the goal. We recommend to add a descriptive name of what the goal is measuring, such as “Visitor clicked the “I want to buy” button. Then just save the goal - nothing else is needed.
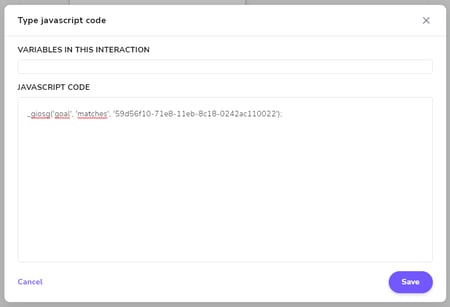
After you have saved the goal, copy the red text that appears in the goal (see picture below)
After copying the above mentioned red text, you add that to your interaction’s button.
First navigate to interactionbuilder.giosg.com → Open the correct interaction → Select the correct button → open the actions tab from the top right.
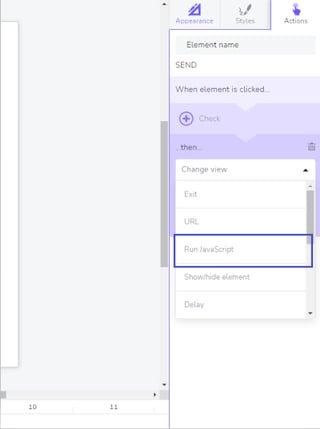
Add a new action from the plus-sign, choose the “Run Javascript” option and replace the example code to with the red text you have copied before.
Make sure that the “Run Javascript” action you created is on top of the action list, in case you have several actions for that button click. You can use the arrows to move actions up and down.
Remember to republish the interaction after this.