Use the Wheel of Fortune element to create fun, gamified interactions for your website! The wheel can for example be used to give out discount codes or other rewards to your visitors, with the possibility to adjust the probability of each section and the number of spins available. The visual style of the parts of the wheel can also be customized to fit your brand!
Basic setup
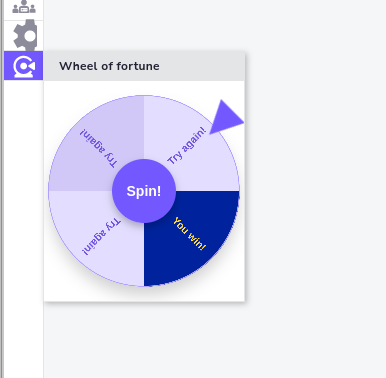
Typically, Wheel of Fortune interactions consist of two main components: the wheel itself, which users can spin to win prizes or rewards, and the celebratory text that follows it, congratulating the user on their win.


Configuring the wheel
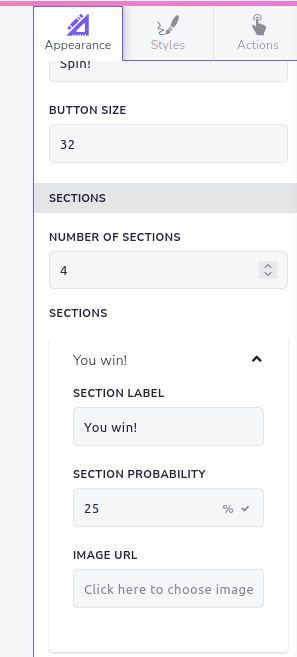
In the appearance tab, select the number of sections you want to show in the wheel, then set the text or image for each section. If you choose to modify the probability of a section, make sure to modify the other sections’ probabilities so that all probabilities add up to 100%.
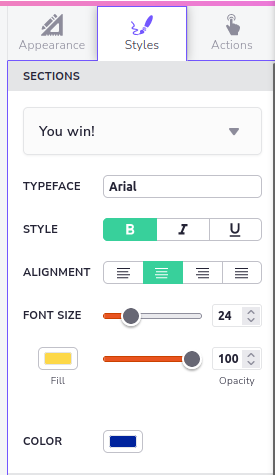
If you want to customize the style of a label, such as the text color, open the Styles tab. Note that you need to select the label of the section that you want to modify from the dropdown menu at the top of the panel. The first style settings apply to the text label of the section, while the last Color selection adjusts the background color of the section.
Section probability
The probability of a section can be set to any value between 0% and 100%. However, the sum of all section probabilities in a single Wheel of Fortune element cannot not exceed 100%. To avoid calculating the probabilities manually, you can leave the probability value empty, which sets the probability to an automatically calculated value. This way, the remaining probability is split between the sections with the automatic value calculation enabled.
Actions
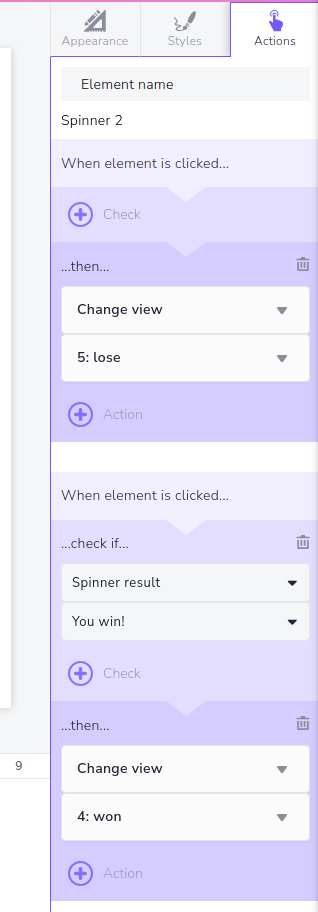
You can trigger different actions depending on the result of the spin. If no condition is set, the chosen action is triggered, regardless of the outcome of the spin.
For example, you can set the actions so that only when the winning section is the spin result, the interaction will move to the winning view. On any other result, the “lose” view will be shown (see the actions in the screenshot).
Adjusting probabilities between spins
To make things more interesting for the visitor, it’s possible to set different probabilities when the user spins the wheel again, or for example on the last spin. To do this, create a duplicate of the view with your wheel of fortune element, and change the probabilities there, and take the visitor there before they spin again.
To make the transition between the two wheel of fortune views smooth to the visitor, you can add a view in between, with for example a comment like “That was close!”. This view can then include a button that takes the visitor to the view with adjusted slice probabilities.
Customer specific codes
If you want to offer larger discounts to customers who have made a certain amount of purchases on the website, you can do this if your e-commerce platform has an API that supports creation of new coupons on the fly (linked to specific email addresses, for instance). In practical terms, you would want a similar interaction as above. It is important to name the coupon text element appropriately (as shown on the right). In our case, it is named "coupon text". This enables you to change content of the text element using the following JavaScript code.
$i.elements.coupon_text.text = "coupon code from your api";
You should put the necessary code to the JavaScript editor in interaction’s advanced settings. You could also put it to wheel of fortune’s “Run javascript” click action, but it would cause delay for the coupon code to show up. In JavaScript you need to get the coupon code from your e-commerce API and apply the received code to the interaction’s text area with the above code.