Follow these four simple steps to make inputs field mandatory in your interaction. When fields are mandatory there has to be data in the field before the form can be submitted.
- Add your input elements
Open your interaction and go to the “Design” view. Choose any input element from the menu on the left (checkbox, input field, radio menu, drop down menu), and place the element in your interaction. - Tick the “Input required” box
Once you have your input elements in place, click your input element and choose “Appearance” from the column on the right. In the “Appearance” section, tick the “Input required” box.
For input fields you can also define what kind of data is valid (email address, phone number, or any text). This option is displayed under the “Input required” tick box. - Add “check if” conditions to your “Send” button
Click on your “Send” button and choose “Actions” from the panel on the right and click “Check”. Make sure to add the “View inputs are valid”, which will check that your “Input required” elements are filled out correctly by the visitor.
Using checkboxes in your form? Choose another “Check”, then “Value equals” “Checkbox” > “Checked”. - Add your actions


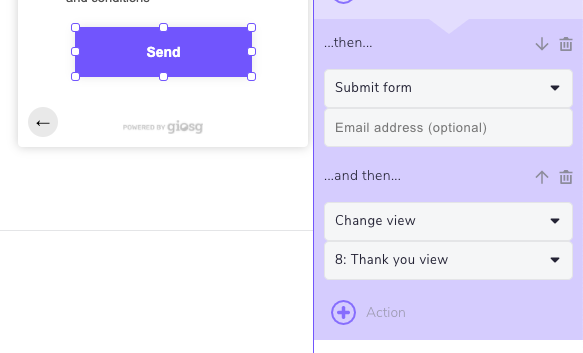
Submit your form by choosing “Submit form” under “Actions”. You can also choose to submit your form to one or more email addresses (not mandatory). Make sure to also guide your visitor to a thank you view, by adding another “Action” (“Change view: add your Thank you view”).
There are ready made forms in our Interaction Builder templates. Navigate to the Interaction Builder front page and choose “New interaction” to use one.