This article covers the following topics:
Creating and editing your brand
Creating and editing your brand
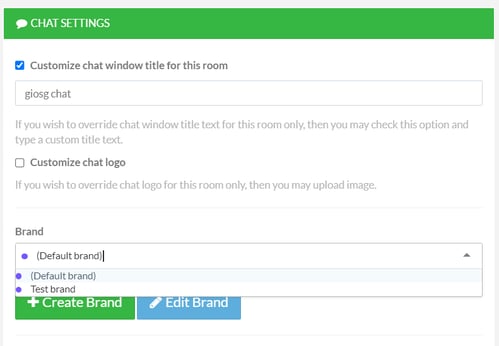
You can access the brand editor by going to Settings → Domains and Rooms → Click the correct room. Then, when you are in room settings, navigate to “Chat settings”. Start creating a new brand by clicking “Create Brand”. which takes you to the brand editor. Existing brands can be edited via "Edit brand".
When creating a new brand, start by giving your brand a name from the top left corner. After that changes can be saved.
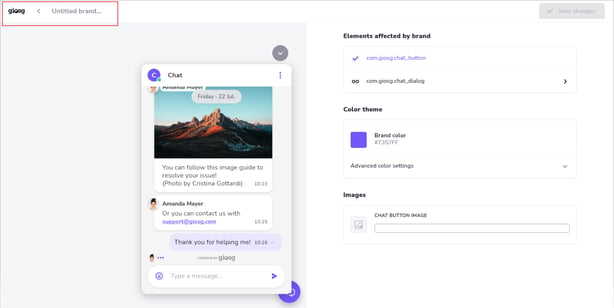
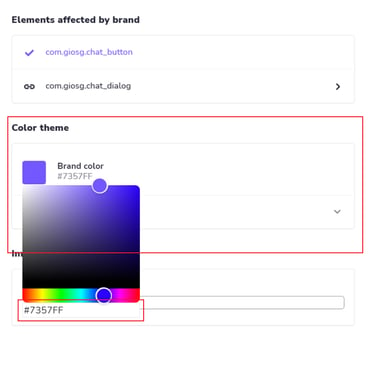
Elements affected by brand
In "Elements affected by brand" on the right side of the page, you can select which element you want to modify; the chat button or the chat window.
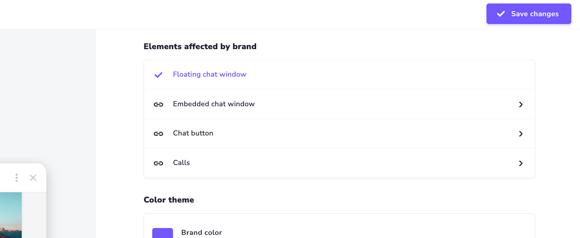
- Floating chat window is the default window, which can be opened from a chat button or an interaction and is floating on top of the page.
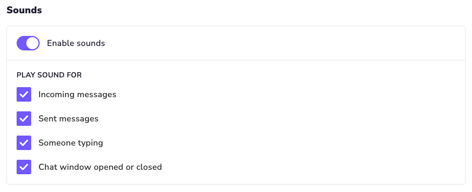
In brand editor, you can edit for example the styles, images and animations used in the window. Also visitor side sound notifications can be changed here. - Embedded chat window allows for in-page implementations, where the chat window is embedded inside a webpage.
Read more about how to embed chat windows here: https://docs.giosg.com/tutorials/embedding_visitor_dialog/ - Chat button is the default chat window, which is activated with the "Enable chat button" rule actions. This chat button is sometimes replaced with an interaction, made with giosg Interaction builder.
In brand editor, you can edit the colors and placement of the button as well as the autosuggest bubble often used with it. - Calls refer to giosg telephony calls. In brand editor, you can edit the incoming call sounds for these.
Modifications
Modifications to the colors are done from the “Color theme” section. By clicking the color you can edit it and fill in a HEX code for it.
In addition to color settings you will, depending on the element you're modifying, find settings like Styles (allowing for example transparent windows), sound notifications, animations and more.
Publishing your brand
When you are happy with the way your brand looks, you can save your brand from the upper right corner from “Save changes”.
The brand is then ready to be set as the brand for your room. You can do this by selecting it from the brand dropdown list in room settings . Remember to save!