Any type of interaction be positioned inside the webpage. Feel free to browse through our template library for inspiration on contact forms, button bots, quizzes, surveys and more. You can also find guides on creating some of these different interactions in our Help center.
In-page interactions are built and designed in giosg Interaction builder like any interaction, but when you publish it you tie it to a certain position - a certain element - on your website. This position should ideally have a unique id and it's often best that your website admin creates the space (a new <div>) for this purpose specifically. More on this later in this article.
Creating your in-page interaction
Create the interaction like you would any interaction and design it to your liking. With in-page interactions, there's a couple of things to keep in mind:
- Pay attention to the size of your interaction and think about the space you want it to take on the website. Use the views' base elements and size them accordingly and build your interaction on top of them.
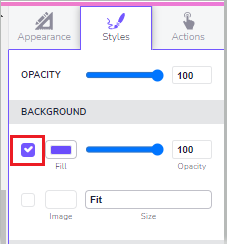
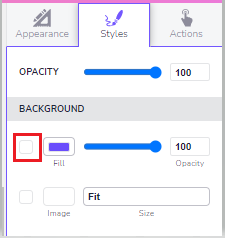
- To make the interaction fit your page better, especially if your page has some other background color than white, it might be a good idea to have a transparent background (base element) in your interaction. You can do this by ticking off the background color in the Styles tab.
Defining the position of the interaction on your website
Now think about where in your webpage you would like the interaction to be shown and select a specific spot for the interaction. You may need to create some space for the interaction, so that it fits the page nicely. Ask your developer to add a new <div> on the page where you

want to reserve the space for the interaction, and make sure the div has a specific id e.g “embed-interaction”.
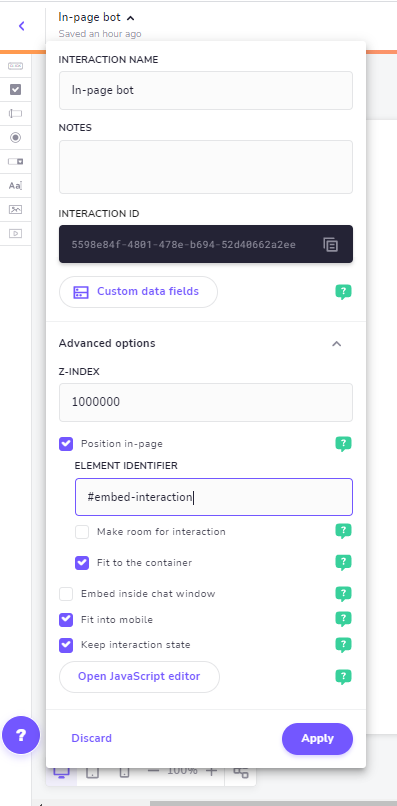
After this it is just a matter of adding the id of the spot that your developer created as the element identifier in giosg Interaction builder. If the id of the element is as in the example:”embed-interaction” the text you need to add as the identifier is: #embed-interaction
Publishing the interaction
You can add the id of the space created for the interaction (described above) by clicking the name of the interaction from the top left corner in Interaction builder. In the menu that opens, choose “Advanced options” and then select “position in-page”. Add the id to the field reserved for it and click "Apply".
Finally, publish the interaction on the Publish page in Interaction builder and go admire the result on your webpage!
If you use the same id on several pages but want to use different interactions on different pages, you can use a URL condition to specify on which page the interaction should be used. The same applies if you've created different interactions for mobile and desktop visitors.