Custom rooms are needed when you want different people to serve different parts of the website. For example, divide your site into Sales, Customer Service and Tech Support, and have these teams take care of chats related to their roles. If you are just planning on adding a new domain, that will be served by your whole team, you only need to add the domain to giosg (see this article).
Create the room :
1. In Settings → Rooms, Click "Create new room" under "Custom rooms"
2. Open the settings for the custom room by clicking on the room. Add the domain for this custom room in the “Connected domains” section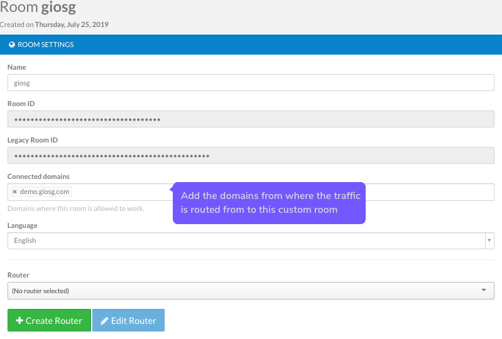
Create a Rule that guides the traffic to that specific room :
3. In Settings → Rules, create a new rule under your main/connected domain. This rule will be used to direct traffic to the room
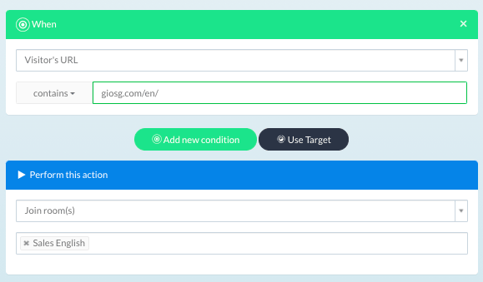
4. In the rule, add the conditions needed to identify the visitors you want to direct to the room (i.e. visitors URL). Then, use action "Join room" and select the room
Edit room settings and set a router for the room :
5. If you are using tags or service hours, remember to set these for your custom rooms as well
6. Create or choose a router for the room (from Rooms → Settings → Choose room → Router). The router is used to route the traffic from the room to specific users, teams or an organization. More information about routers can be found here.
Keep in mind that while using custom rooms, all chat related rules (rules for showing the chatbutton, sending autosuggests...) should be set up in the custom rooms as those will be the rooms that chats take place in.
If you are using custom rooms, it is usually good practice to only use chat in custom rooms and never in the domain room. In these cases, make sure you have no router selected for the domain room.